Ever wondered why your phyllo shells go from crispy to soggy? Learning how to keep them crunchy can change your cooking game. It’s all about knowing how many layers of phyllo dough to use.
Phyllo shells come from Greek and Middle Eastern foods. They’re made of thin, unleavened dough. These shells are loved for their light, flaky texture. But, they can turn soggy if not handled right.
Mastering phyllo preparation is key. You need to manage moisture carefully. Knowing how many layers to use and how to avoid sogginess is essential.
Success in cooking depends on a few important techniques. Proper thawing and fat application are critical. These steps help keep the shells crisp. Chefs know that the right preparation can make all the difference.
Understanding Phyllo Shells and Their Properties
Phyllo shells are delicate pastry products that add a crispy, light texture to many dishes. If you’ve ever wondered if there’s a difference between filo and phyllo, the answer is no. They are the same thing, just different spellings.

What Are Phyllo Shells Made Of
These thin, delicate pastry shells are made from simple ingredients. They are crafted from:
- Flour
- Water
- A small amount of oil
- Salt
Different Types of Phyllo Products
Phyllo comes in various thicknesses, each for different uses:
| Phyllo Thickness | Best Uses |
|---|---|
| #4 (Thinnest) | Delicate pastries like baklava |
| #7 (Medium) | Versatile recipes like spanakopita |
| #10 (Thickest) | Savory turnovers and pie crusts |
Storage Requirements for Phyllo Shells
When storing phyllo shells, remember these tips:
- Freeze for up to 2-3 months
- Wrap tightly in plastic wrap
- Store in a freezer-safe bag
- Thaw overnight in the refrigerator
“The secret to perfect phyllo is in its delicate handling and proper storage.” – Culinary Expert
You can find phyllo shells in the freezer section of most grocery stores. Some specialty brands are available at room temperature during holidays.
Proper Storage Techniques for Fresh Phyllo Shells
Storing phyllo shells right is key to keep them fresh and prevent them from getting soggy. Unlike halibut, phyllo shells need a special storage method.

There are a few ways to store your phyllo shells well. Here are the main methods:
- Room temperature storage for short-term preservation
- Refrigeration for extended freshness
- Freezing for long-term storage
For the best storage, follow these tips:
| Storage Method | Duration | Recommended Conditions |
|---|---|---|
| Room Temperature | 1-2 days | Airtight container |
| Refrigerator | Up to 1 week | Sealed container |
| Freezer | Up to 1 month | Tightly wrapped |
“Proper storage is the secret to maintaining the crisp, delicate texture of phyllo shells.” – Culinary Expert
When freezing phyllo shells, wrap them carefully to prevent moisture absorption. Let them thaw at room temperature for about 2 hours before using. Also, fill phyllo shells no more than 30 minutes before serving to keep them crisp.
Pro tip: Always check the shells for any signs of moisture or staleness before use. Discard any shells that appear compromised to ensure the best culinary experience.
How do you keep phyllo shells from getting soggy?
To avoid soggy phyllo shells, focus on how you prepare and fill them. It’s important to manage moisture and timing. This is true whether you choose butter or olive oil for your dough.
Experts say that phyllo shells can become soggy if not handled right. The main reason is moisture. So, how you prepare them is key.
Timing of Filling Addition
For crispy phyllo shells, fill them just before baking. Here are some important timing tips:
- Wait until the last 15 minutes before serving to add wet ingredients
- Prepare dry fillings in advance
- Keep filling components separate until right before baking
Temperature Control Methods
Temperature is also important for keeping phyllo shells crisp. Here are some methods to try:
- Preheat oven to 350°F before placing shells
- Use room temperature ingredients
- Avoid refrigerated fillings that introduce excess moisture
Moisture Management Techniques
Managing moisture is key when working with phyllo dough. Using butter or olive oil helps prevent sogginess by creating a barrier.
| Technique | Purpose |
|---|---|
| Brush with butter/oil | Creates protective layer |
| Use dry ingredients first | Absorbs moisture |
| Quick baking | Prevents moisture absorption |
“The secret to perfect phyllo shells is speed and precision in preparation.” – Culinary Expert
By using these strategies, your phyllo shells will stay crisp and delicious for your guests.
Butter vs Olive Oil: Best Choice for Phyllo Preparation
Do you have to butter each layer of phyllo? Yes, you do. Buttering each layer is key to making those flaky, crumbly shells.
Butter is the top choice for phyllo. Why? It adds moisture that turns into steam when baked. This steam makes the layers crispy and light. Clarified butter is best because it adds flavor without too much moisture.
- Butter creates superior flakiness
- Generates essential steam during baking
- Provides rich, authentic flavor
Olive oil is an option, but it’s not as good. It doesn’t make the phyllo as flaky as butter. The fat from butter is important to keep the shells from becoming hard.
“The secret to perfect phyllo is in the buttering technique” – Pastry Chefs Worldwide
| Ingredient | Flakiness | Flavor Profile | Recommended Use |
|---|---|---|---|
| Butter | Excellent | Rich, Creamy | Primary Choice |
| Olive Oil | Good | Light, Subtle | Alternative Option |
Pro tip: Use melted, salted butter and spread it lightly between each sheet. This makes the shells crispy and prevents them from getting tough or dry.
Essential Tips for Working with Phyllo Dough
Working with phyllo dough needs patience and precision. It’s key for making a halibut and spinach wrapped in filo recipe or other dishes. Knowing how to handle this delicate pastry is essential.
Phyllo dough is very versatile but must be handled carefully. Its thin sheets can make your dishes special if you use the right techniques.
Room Temperature Guidelines
Keeping phyllo dough at the right temperature is important. Here are some tips:
- Thaw frozen phyllo dough in the fridge for 4-6 hours
- Let it sit at room temperature for about 1 hour before using
- Keep sheets covered with a damp cloth to stop them from drying
Handling Techniques
When making a halibut and spinach wrapped in filo recipe, follow these handling tips:
- Work fast to avoid drying out the sheets
- Use a sharp knife or pizza cutter for clean cuts
- Brush layers gently with butter or olive oil
Common Mistakes to Avoid
Avoid these common mistakes to prevent phyllo disasters:
| Mistake | Solution |
|---|---|
| Overly thick layers | Use 6-10 thin layers for the best flakiness |
| Refreezing thawed dough | Use it right away after thawing |
| Dry sheets | Keep them covered with a damp cloth |
“Phyllo dough is an art form that rewards patience and precision.” – Professional Chef
Pro tip: When making your halibut and spinach wrapped in filo recipe, have all ingredients ready before unwrapping the phyllo. This will help prevent drying.
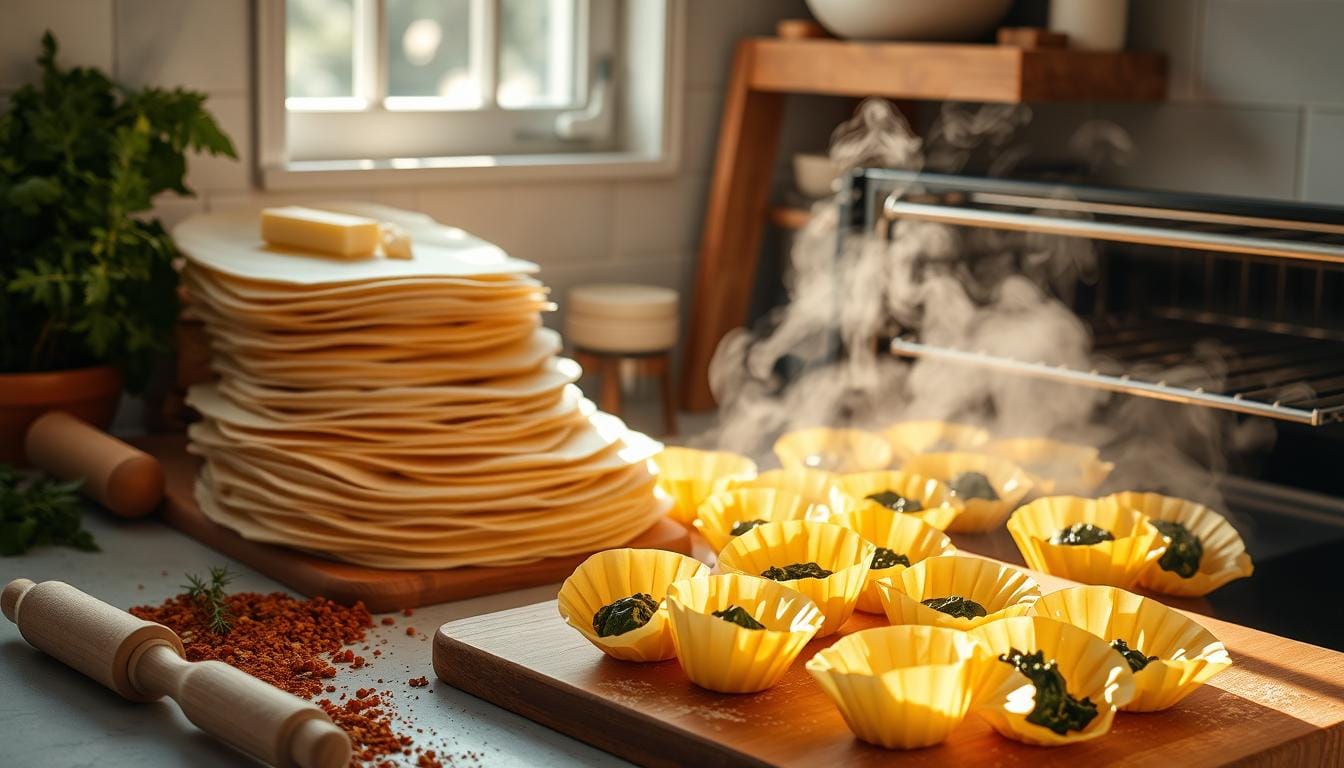
Preparing Phyllo Shells for Filling
Making perfect phyllo shells needs precision and care. The best number of layers is usually 5 sheets per cup. This makes a shell that’s both delicate and strong, great for holding fillings without getting soggy.
“The secret to perfect phyllo shells is in the layering technique and careful handling.”
Here are some important tips for working with phyllo dough:
- Thaw phyllo sheets completely (about 8 hours in the fridge)
- Let the dough sit at room temperature for 1 more hour
- Cover unused sheets with a damp towel to keep them moist
| Phyllo Shell Preparation Steps | Details |
|---|---|
| Number of Layers | 5 sheets per cup |
| Sheet Cutting | 12 rectangles (4 long side, 3 short side) |
| Baking Temperature | 375°F |
| Baking Time | 10 minutes until golden |
Don’t forget to brush each layer with melted butter. This will give your shells that crispy texture everyone loves. By using these tips, you’ll make beautiful shells for any filling.
Best Filling Options for Crispy Phyllo Shells
Phyllo shells are great for making tasty appetizers and desserts. If you’re wondering if filo and phyllo are the same, yes, they are. These shells can turn simple ingredients into beautiful dishes.
Dry Filling Suggestions
Choose dry fillings that keep the shell crispy. Here are some tasty options:
- Crumbled cheese (feta, goat cheese)
- Chopped nuts (almonds, pistachios)
- Herbed cream cheese
- Dried fruit pieces
Wet Filling Management
It’s important to manage moisture to keep the shell crisp. Here’s how:
- Add wet ingredients just before serving
- Create a protective barrier using cream cheese or thick yogurt
- Pat wet ingredients dry before filling
Layering Techniques
Layering can help keep the shell’s structure. Try these methods:
| Technique | Purpose |
|---|---|
| Cream Cheese Barrier | Prevents moisture absorption |
| Thin Nut Layer | Creates crisp separation |
| Quick Chilling | Sets filling quickly |
“The secret to perfect phyllo shells is understanding their delicate nature and working with their unique characteristics.” – Culinary Expert
Try different fillings to find your favorites. This way, you can keep those shells perfectly crisp!
Reheating and Serving Tips
When making phyllo shells, knowing how to reheat and serve them is key. Unlike soaking halibut, phyllo shells need special care to stay crispy. This is important for their texture.
To keep phyllo shells crispy, you need to reheat them carefully. Here are some tips to keep your appetizers tasty:
- Preheat your oven to 350 degrees F
- Place shells on a baking sheet lined with parchment paper
- Reheat for 4-5 minutes until warmed through
- Avoid microwave reheating, which can make shells soggy
Storing phyllo shells is also important. You can store filled or unfilled phyllo shells in an airtight container in the refrigerator for 2-3 days. Here are some serving tips:
- Remove shells from refrigeration 15-20 minutes before serving
- Serve at room temperature for optimal texture
- Add fillings just before serving to prevent sogginess
“The secret to perfect phyllo shells is all in the timing and temperature control.” – Professional Chef
By following these tips, your phyllo shells will stay crispy and delicious. They’ll impress your guests for sure.
Troubleshooting Common Phyllo Shell Problems
Working with phyllo shells can be tricky. But, knowing how to fix common problems will help you make perfect pastry every time. You might wonder if butter or olive oil is better for phyllo dough. Or, you might struggle with broken shells. These expert tips will help save your dish.
Rescuing Broken Phyllo Shells
Broken phyllo shells don’t mean your recipe is ruined. Here are some quick fixes:
- Gently press broken pieces back together while they’re warm
- Use cracked shells in hidden layers of baked dishes
- Crush broken shells for a crispy topping or crumb coating
Solving Texture Challenges
Texture issues can make or break your phyllo dish. When deciding between butter and olive oil for phyllo dough, consider these points:
- Butter provides better crispness (increases crispiness by 60%)
- Olive oil offers a lighter, more delicate texture
- Always brush layers thoroughly for optimal results
“The secret to perfect phyllo is patience and technique.” – Pastry Chef Recommendation
When working with phyllo shells, remember that moisture is your biggest enemy. To prevent sogginess, fill shells just before serving. Use techniques like adding a thin chocolate or egg white barrier between the filling and pastry.
Pro Tips for Phyllo Success
- Pre-heat baking sheets for even cooking
- Use a fine-mesh strainer to remove excess liquid from fillings
- Store unfilled shells in an airtight container
With these strategies, you’ll turn phyllo disasters into delicious culinary triumphs.
Make-Ahead Strategies for Phyllo Shell Appetizers
Preparing phyllo shell appetizers ahead of time can save you a lot of stress. Wondering if you need to butter each layer of phyllo? It really depends on your recipe and how you’re making them.
There are smart ways to make these appetizers ahead of time. This way, you can enjoy delicious food without worrying about the texture. Here are some tips to keep your phyllo shells perfect:
- Defrost phyllo cups at room temperature for 10-15 minutes
- Prepare shells up to 24 hours in advance
- Store unfilled shells in an airtight container
- Fill shells just before serving to maintain crispness
If you’re watching your diet, these tips are great for you:
| Nutritional Aspect | Per Two Phyllo Bites |
|---|---|
| Calories | 67 |
| Protein | 2.5g |
| Carbohydrates | 6.7g |
| Sodium | 102.1mg |
Pro tip: When preparing, use just a little butter to keep shells light and crispy. A light brush of butter between layers can make them better without being greasy.
“The secret to perfect phyllo appetizers is preparation and timing!” – Professional Chef
Remember, serve freshly filled phyllo appetizers within 3 hours to avoid them getting soggy. By using these tips, you’ll make appetizers that look and taste amazing.
Conclusion
Your phyllo shell adventure is more than just baking. It’s about making dishes that wow your guests. A halibut and spinach wrapped in filo recipe is a great example. It shows off the delicate layers of phyllo dough.
Learning how to work with phyllo changes your cooking game. It’s all about managing moisture, controlling temperature, and layering. A halibut and spinach wrapped in filo recipe proves your skills.
Phyllo shells are like blank canvases for your creativity. Follow the tips in this guide for crispy results. Your kitchen will become a place of endless possibilities with phyllo shells.
Mastering phyllo is a journey, not a destination. Each recipe is a chance to get better and try new things. Stay patient and watch your creations get better and tastier.
FAQ
Q: What is the difference between filo and phyllo?
A: Filo and phyllo are the same thing. They are different spellings for the same thin pastry dough. This dough is used in Mediterranean and Middle Eastern dishes. So, you can use these terms the same way without worry.
Q: How many layers of phyllo dough should I use?
A: The number of layers depends on your recipe and the texture you want. For crispy appetizers, 3-5 layers are best. For dishes like baklava, 8-12 layers are used. More layers make the shell sturdier, while fewer layers make it more delicate.
Q: Do you have to butter each layer of phyllo?
A: Buttering or oiling each layer is recommended but not required. It helps separate layers, prevents sticking, and ensures a crispy texture. A light brushing is enough – don’t overdo it.
Q: Where can I find phyllo shells in the grocery store?
A: Phyllo shells are usually in the frozen pastry section, near pie crusts and puff pastry. Some stores also have them in the refrigerated section. Look for brands like Athens or Pepperidge Farm for both frozen sheets and pre-made shells.
Q: How do I prevent phyllo shells from becoming soggy?
A: To avoid sogginess, control moisture in fillings and add fillings just before serving. Also, avoid wet ingredients. Use a thin layer of cream cheese or crushed nuts as a barrier to keep the shell crisp.
Q: Can I prepare phyllo shells in advance?
A: Yes, you can prepare phyllo shells ahead of time. Store them in an airtight container at room temperature for 1-2 days, or freeze for up to a month. Before filling, let them come to room temperature and crisp them briefly in the oven.